Twitter Sentiment Analysis – Part 1. Extracting and Mining Twitter Data Using Zapier, RapidMiner and Google/Microsoft Tools
In this short series (two parts – second part can be found HERE) I want to expand on the subject of sentiment analysis of Twitter data through data mining techniques. In the previous post I showed how to extract Twitter data using an SSIS package, load it into a relational database, and create a small cube to show the harvested tweets in a pivot table. For me, the best part of working on that solution was creating a stored procedure which determines Twitter feeds sentiment based on a dictionary of most commonly used words. It was a pretty rudimentary approach; nevertheless, it worked well and turned out to be an effective way of analysing social media data using bare SQL. In the next few posts I want to elaborate on the sentiment analysis part and rather than using SQL, I will show how to conduct such analysis using more sophisticated tool, a free data mining software called RapidMiner.
This series will be split into two separate posts – first one about the methods of tweets extraction and collection and second one on the actual sentiment analysis. In this first post I want to focus on how to amass a decent pool of tweets in two different ways using a service called Zapier, Google Docs and a little handy tool called GDocBackUpCMD as well as SSIS and a little bit of C#. Each way has its pros and cons but they are more robust then using RSS/ATOM feed as shown in my previous post.
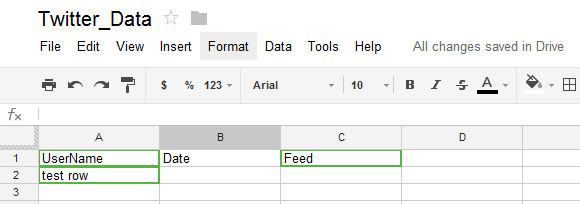
Firstly, let’s look at Zapier. Zapier is a great service which allows web applications to ‘talk’ to each other by providing integration platform for a number of popular web services e.g. YouTube, Gmail, Evernote, Paypal etc. It is even possible to integrate the data into MS SQL Server; however this is classed as a premium service with a higher cost involved. We will use Zapier to extract Twitter feeds into a Google Docs spread sheet and then copy the data across to our local environment to mine it for sentiment trends. To get started make sure you have a Twitter account, Google account and have set up Zapier account as well. Next, in Google Docs, create an empty spreads sheet with three columns and their headings – I have labeled mine as ‘UserName’ for the feed author, ‘Date’ for when the tweet was posted and ‘Feed’ representing the content of the tweet. Also, make sure that you enter a dummy record in one of the cells – I have added ‘test row’ as per screenshot below. For some reason Zapier requires that to validate the object it will be writing to.
Once all your accounts are active and you have a Google Docs spread sheet skeleton ready, building a zap is really easy. Just select the services you wish to integrate by dragging and dropping them onto the top process pane, configure the parameters and enable the integration. Here, I have placed Twitter as a source and Google Docs as a target.

 Next, enable Zapier access to those services and configure the parameters. Below, on the left hand side, I have ‘Search Mentions’ option selected and a word ‘Bigdata’ to account for all tweets which contain this string. On the right hand side I have connected to my previously created ‘Twitter_Data’ spread sheet and populated each spread sheet column with a Twitter variable by dragging and dropping (left to right) individual tweet attributes e.g. Twitter attribute called ‘Text’, which is the actual tweet content, will go into the spread sheet column named ‘Feed’. When this task is completed you also have a choice to set up filters and pump some sample data into the document to ensure everything has been configured correctly.
Finally, enable the zap and bingo, every 15 minutes (using fee account) you should see your Twitter data populating the spread sheet. The complete zap should resemble the image below.
Providing your zap has run, we are ready to copy the Google Docs data into our local environment. As mentioned before, in this post I will explain how to achieve this using two different methods – free tool called GDocBackUpCMD with a little batch file and SSIS for database integration as well as C# hacking with SQL Server Integration Services.
Using Excel, SSIS and GDocBackUp Utility
Let’s start with GDocBackUp utility. Download the CMD version from HERE (GUI version is also available but will not work in this context) and unpack it into your C:\ drive into ‘GDocBackUpCMD’ directory. Also in your C:\ drive create an empty directory called ‘Tweets’ – this will be the place where our local spread sheet version will be stored. Next, open up Notepad or other text editor and create a new file. Type in the following content into you file, making sure you populate ‘username’ and ‘password’ variables with your credentials.
@ech off
echo
c:\GDocBackupCMD\GDocBackupCMD.exe -mode=backup -username=YourUserName -password=YourPassword -destDir=c:\Tweets -docF=xls -sprsF=xls -presF=xls -drawF=xls
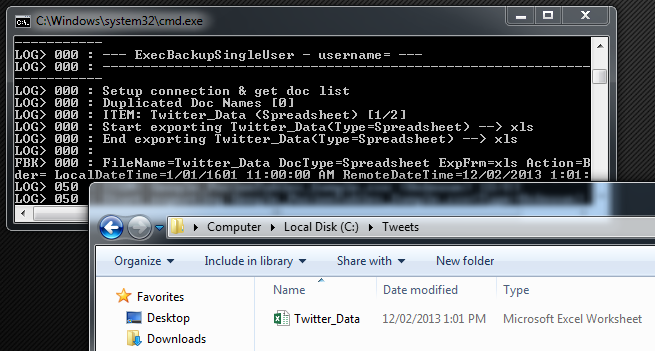
Save the file on the C:\drive as ‘Export_Tweets.bat’. The two directories and the batch file should look as per image below.
Now we can execute the file to see if the process works as expected. Double-clicking on the batch file should execute it in the console view and provided all the parameters were entered correctly run the process. After completion we should also have a copy of our Google Doc spread sheet in our local folder ‘Tweets’.
Finally, all there is to do it to create a database table where all twitter data will be exported into and a small SSIS package which will help us populate it based on the local spread sheet version as per below.
Naturally, if you wish to make it a continuous process, a more elaborate package would be required to handle truncation (either Google spread sheet or the database table), data comparison for already stored tweets and some sort of looping.
This is just one of the ways to export Google Docs spread sheet into our local environment. Another method involves a little bit of C# but in turn does not rely on other utilities and tools; it can all be done in SSIS.
Using C#, SSIS and Google API SDK
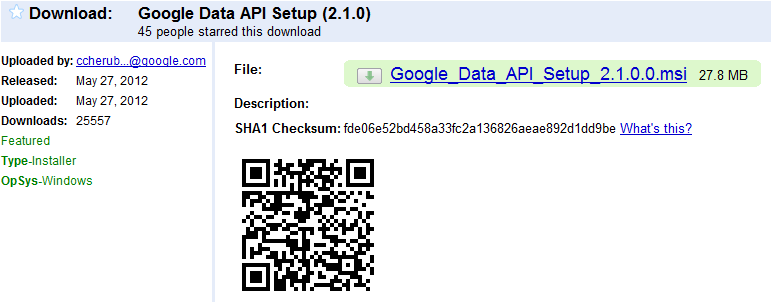
First, we need to download Google data API SDK for .NET platform which can be obtained from HERE. The purpose of API SDK is to create an interface between Google online services and the client which will be taken advantage of those, in our case the SSIS package.
By default, Google API setup places the DLLs in C:\Program Files\Google\Google Data API SDK\Redist. When you open up this location you should see a number of DLL files, the ones we are interested in are Google.GData.Client.dll, Google.GData.Extensions.dll and Google.GData.Spreadsheets.dll. Next, we need to register those in GAC, otherwise known as Global Assembly Cache. For this purpose you can use the gacutil.exe executable being called from a batch file or command line, GacView tool if you are afraid of the console or simply by copying those three DLL files into C:\Windows\assembly folder. If for some reason you get an error, you should change the settings for UAC (User Access Control) by just typing ‘UAC’ in the Windows search pane, adjusting the settings and rebooting the computer. Once the DLLs have been registered we can create out database table which will store our Twitter feeds. As my spread sheet has three columns, we will create a table with three attributes, executing the following code:
CREATE TABLE [dbo].[Twitter_Feed](
[Feed]     [varchar] (300) NULL,
[Date]     [varchar] (100) NULL,
[UserName] [varchar] (100) NULL)
Next, let’s create an Integration Services package. To do this, in a blank project create two variable of string data type which will represent your Gmail User ID and Gmail password and populate them with your credentials as per image below.
Now, drop a Data Flow Task from the tools menu onto Control Flow tab pane and within it (in Data Flow tab) place a Script Component and an OLE DB Destination component, linking the two together as per below.
In the Script Component properties pane enter the two variables we defined earlier as ‘ReadOnlyVariables’.
Next, in the Inputs and Outputs property create three outputs columns correlating to the names of the database table we created earlier, ensuring that the data types and lengths are the same as your database table.
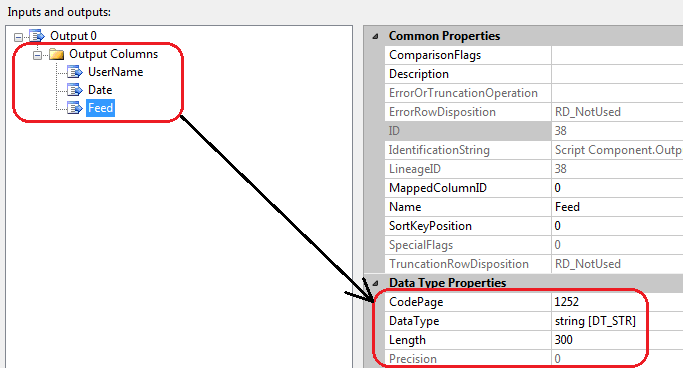
Just before we are ready to write the code, we should reference/add the DLLs form Google API we downloaded previously. Go ahead and click on Edit Script which should invoke Visual Studio code environment and under Solution Explorer on the right hand side, right-click on References and select ‘Add Reference…’. From here, navigate to the directory where DLLs are stored (on my machine they were saved under C:\Program Files (x86)\Google\Google Data API SDK\Redist and select Google.GData.Client.dll, Google.GData.Extensions.dll and Google.GData.Spreadsheets.dll files. When all three files were added, click OK.
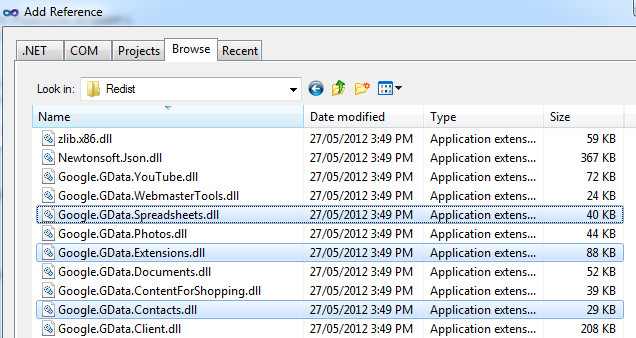
Finally, we are ready to write some code. Enter the following C# script (ensuring that appropriate adjustments are made to reflect your spread sheet/file name, sheet/tab name and column headings) and when finished, save the code and run the package.
using System;
using System.Data;
using Microsoft.SqlServer.Dts.Pipeline.Wrapper;
using Microsoft.SqlServer.Dts.Runtime.Wrapper;
using Google.GData;
using Google.GData.Client;
using Google.GData.Extensions;
using Google.GData.Spreadsheets;

[Microsoft.SqlServer.Dts.Pipeline.SSISScriptComponentEntryPointAttribute]
public class ScriptMain : UserComponent
{
    public override void PreExecute()
    {
        base.PreExecute();
    }
    public override void PostExecute()
    {
        base.PostExecute();
    }
    public override void CreateNewOutputRows()
    {
        SpreadsheetsService GoogleExcelService;
        GoogleExcelService = new SpreadsheetsService("Spreadsheet");
        GoogleExcelService.setUserCredentials(Variables.GmailUserID, Variables.GmailPassword);
        SpreadsheetQuery query = new SpreadsheetQuery();
        SpreadsheetFeed myFeed = GoogleExcelService.Query(query);

        foreach (SpreadsheetEntry mySpread in myFeed.Entries)
        {
            if (mySpread.Title.Text == "Twitter_Data")
            {
                WorksheetFeed wfeed = mySpread.Worksheets;
                foreach (WorksheetEntry wsheet in wfeed.Entries)
                {
                    if (wsheet.Title.Text == "Sheet1")
                    {
                        AtomLink atm = wsheet.Links.FindService(GDataSpreadsheetsNameTable.ListRel, null);
                        ListQuery Lquery = new ListQuery(atm.HRef.ToString());
                        ListFeed LFeed = GoogleExcelService.Query(Lquery);
                        foreach (ListEntry LmySpread in LFeed.Entries)
                        {
                            Output0Buffer.AddRow();
                            Output0Buffer.UserName = LmySpread.Elements[0].Value;
                            Output0Buffer.Date = LmySpread.Elements[1].Value;
                            Output0Buffer.Feed = LmySpread.Elements[2].Value;
                        }
                    }
                }
            }
        }
    }
}
Hopefully, everything executed as expected and when you query the table you should see the tweets extracted from the Google spread sheet content.
In the second part to this two-part series I want to explore sentiment analysis using freely available RapidMiner tool based on the data we have collected and create a mining model which can be used for Twitter feeds classification. Finally, if you’re after a more adhoc/playful sentiment analysis tool for Twitter data and (optionally) have some basic knowledge of Python programming language, check out my post on using etcML web based tool under THIS link.
http://scuttle.org/bookmarks.php/pass?action=addThis entry was posted on Thursday, February 28th, 2013 at 1:02 pm and is filed under .NET, Excel, How To's, SQL, SSIS. You can follow any responses to this entry through the RSS 2.0 feed. You can leave a response, or trackback from your own site.





admin March 10th, 2014 at 10:47 pm
Hi Mona. Sorry to hear you’re having issues. Can you capture the output of the batch file during its execution? If so, what is the error message? Also, did you install the correct version of the tool i.e. the CMD version not the GUI one? Happy to help but will require more information on the issues you’re having during runtime……cheers, Marcin