Hadoop Musing – How to Install Hortonworks Hadoop Distribution (Sandbox and HDP) Locally On Microsoft Windows
Introduction
The venerable Hadoop obsession has taken its toll on me so I thought that in the spirit of the current data management trends it would be a good idea to start looking into the whole Hadoop ecosystem. Every executive I have recently spoken to about their data strategy has been asking about it (whether they actually understand it or not is a different story) and I start to feel that if I don’t succumb to this craze I will miss out on this worldwide phenomenon that’s been evolving behind my back for a few years now – the ‘Big Data’ movement. I went to a few seminars and meet-ups where the folks from Claudera, Hortonworks and others drum on about how nearly every single major RDBMS vendor will either rot away clinging to its archaic ways of storing structured data and disappear into the abyss of relational dismay unless they join this new data liberation movement and start integrating NoSQL, Big Data, Hadoop-like paradigms into their application pool to stay somewhat relevant in this new world order. Regardless of whether this PR web they’re spinning has any merit or not or what the future actually holds, there is nothing better than me getting my hands dirty and trying this thing for myself. So here I am, looking at my first Hadoop deployment and writing this post to help other folks out there make up their mind on the Hadoop vs. OLTP/OLAP technology for data analysis and management.
Given that it’s my first post on this topic (plenty more in the pipeline so make sure you stay tuned) I thought it would be a good idea to start with something simple and outline the installation process for Hortonworks Hadoop distribution on a Windows platform. Hortonworks also provides a ready-made VM image which can be deployed with just a few click but given that the actual installation process is slightly more involved, I though it’s a good idea to also step through it providing more details.
Installing Hortonworks Sandbox v. 2.0 (on premise)
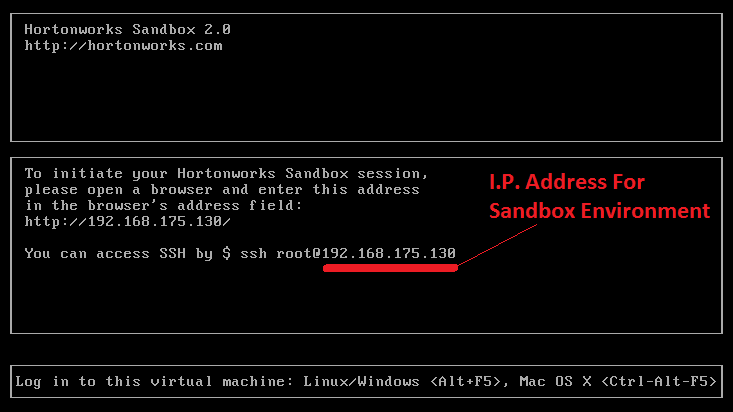
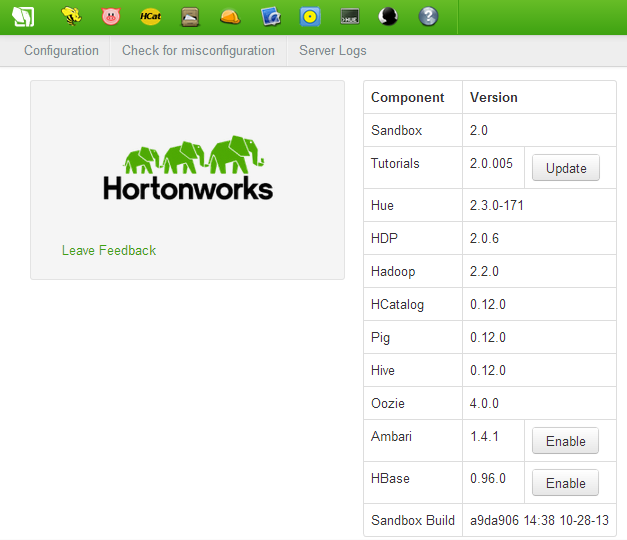
Let’s start with the sandbox which can be downloaded from the Hortonworks website and deployed using either a free VirtualBox application (Hortonworks recommended option) or other virtualization software e.g. VMWare, Hyper-V (just make sure that virtualization is enabled in the BIOS, minimum RAM can be allocated if you plan to run Ambari and Hbase (8GB) and a compatible browser is installed on your box e.g. Chrome 25+, IE 9+ etc.). After downloading the VM’s image, the ‘installation’ process is very straightforward i.e. providing you have a suitable application to mount the image installed, it’s just a matter of double-clicking on the downloaded file which starts the mounting process, pointing your browser at the I.P. address as per the installation output, filling out the registration form and deepdiving into the sandbox. Below are the sample screenshots depicting the installation session at its completion and the browser interface for the sandbox environment when first initiated.
Installing HDP 2.0 for Windows (on premise)
Installing HDP is a little bit more involved and given the fact that the final product does not include native/out-of-the-box Apache Ambari or Hue components, it’s a little underwhelming to know that you cannot use GUI to manage HDP or query its data without additional configuration required that can be quite complex for someone uninitiated.
The following is a collection of step-by-step instructions on how to provision a single node installation of HDP on Windows Server 2012 R2. However, before we can commence the installation process, several prerequisites need to be fulfilled without which the process will fail so make sure all of those are met prior to cluster deployment.
- Install Microsoft Visual C++ 2010 Redistributable package (64-bit)
- Install Microsoft .NET Framework 4.0 (unless installing on Windows Server 2012 or higher in which case it should already be a part of the base installation)
- Install Java Development Kit (JDK)
- Install Python 2.7 (or higher if superseded by the newer version)
Installing the first two should not be a problem and usually no additional configuration is required. However, when installing Java JDK and Python, further tweaks are required so I think it’s a good idea to outline those in more details.
Java JDK Installation and Configuration
After Java JDK has been downloaded (the supported version can be fetched from HERE), install it to a directory which has no white space characters in its path. This is very important as the default option/path will not work! You can, for example, nominate the following as the new installation directory – C:\Java (as per image below) – which has no spaces in its directory path.

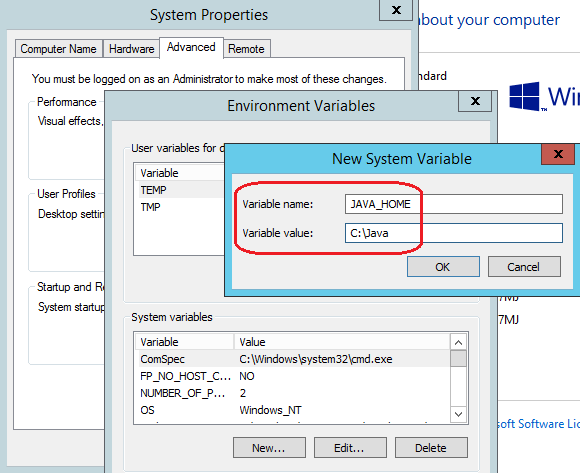
Next, create a system variable called JAVA_HOME and assign the full path to the installation directory defined earlier for JDK as its value. This is done by opening up Control Panel’s System pane and under Advanced system settings and Advanced tab clicking on Environment Variables button. Next, under System variables, click New and enter the variable name as JAVA_HOME. Finally, enter the variable value as the installation path for JDK e.g. C:\Java as per image below and confirm your input/selection by clicking on OK/Apply Changes when finished.
Python 2.7 Installation and Configuration
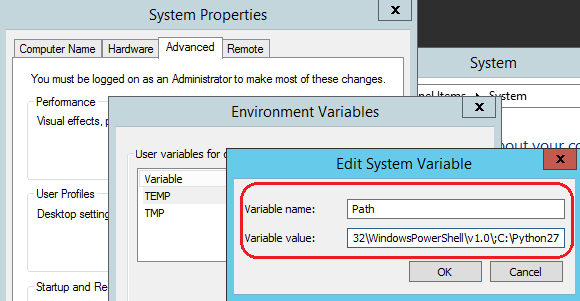
After you downloaded the Windows specific python distribution (the binaries can be fetched from HERE), install it using the default configuration. Next, update the path settings in a similar way we did when configuring Java JDK i.e. go to Control Panel -> System pane -> Advanced settings -> Advanced system tab -> Environment Variables button and under System Variables find PATH and click Edit. In the Edit windows, modify path by appending the installation path for your Python directory to the value of PATH. For example, if the Python executable is installed in C:\Python27, you must append this value to PATH as per image below.
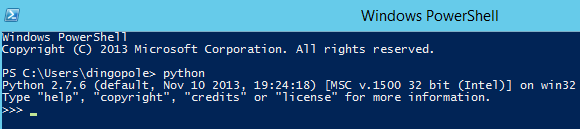
You can validate Python installation by opening up PowerShell terminal and typing in python. If the installation and configuration were successful you should get a response similar to the image below.
Server Configuration
Now it’s time to configure the server before we can begin with HDP installation. The below steps outline Windows Server configuration and HDP provisioning.
Firstly, obtain the HOSTNAME for the server you’re installing to. This can be achieved by typing hostname in the command line or Windows PowerShell environment and capturing the output as per image below.

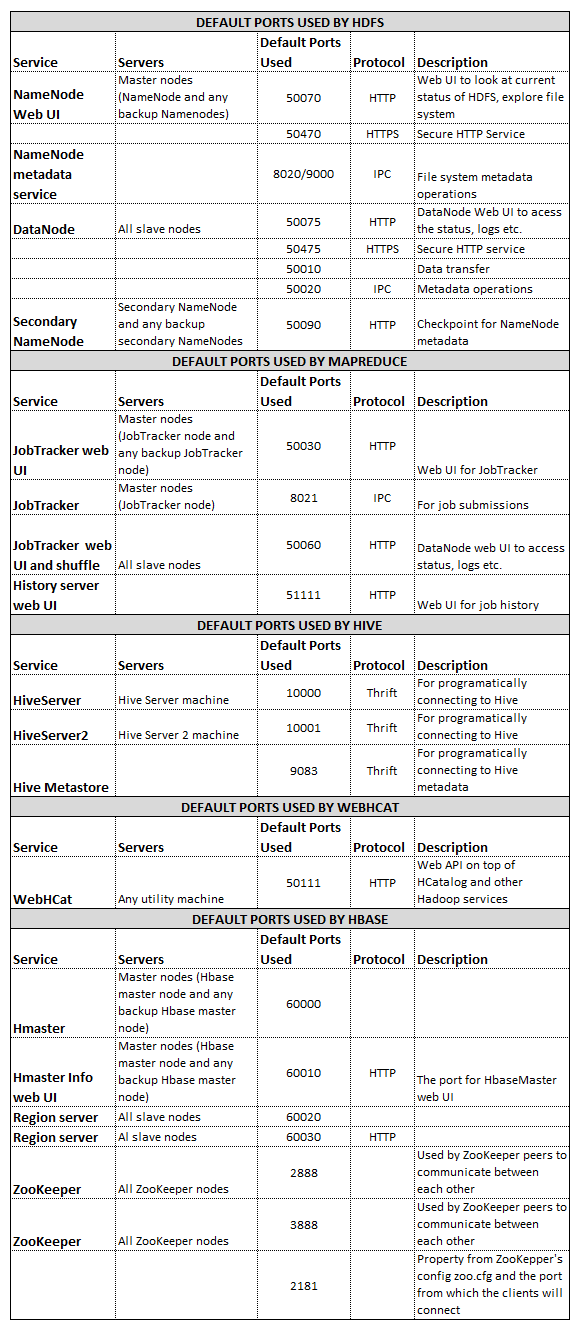
Next, disable the firewall and open up all ports. The simplest way around it is to go to the Control Panel, type in Firewall into the search box and click on Check Firewall Status. Next, click on Turn Windows Firewall On or Off to turn it off for all available networks. Alternatively, individual ports will require to be opened. The below table outlines the default ports used by various services so unless you are in a position to turn the firewall off completely, these will need to be opened before HDP installation.
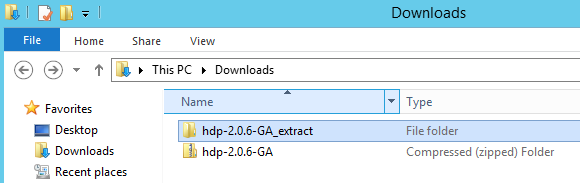
 Next, download HDP from Hortonworks website (currently distributed as a zipped up file) and go to the folder where the downloaded file was saved. Extract its content to a different directory. For the purpose of this demo I decided to simply extract it into the Downloads directory, where the downloaded package was stored under another directory called hdp-2.0.6-GA_extract as per image below.
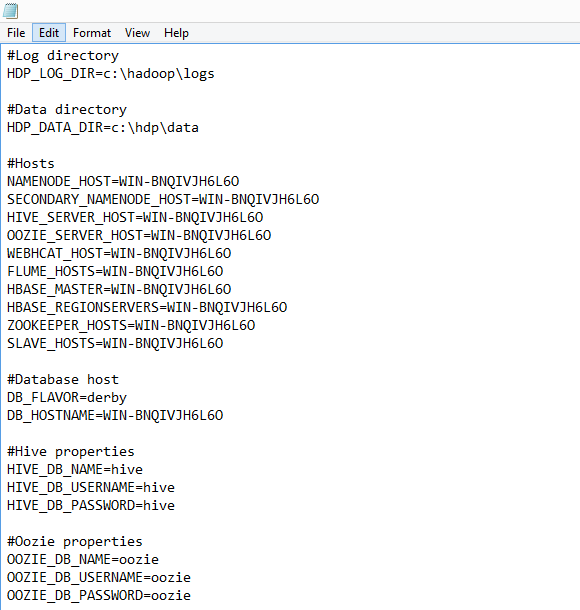
At this point, under the hdp-2.0.6-GA_extract directory, you should see a number of files, one of them called clusterproperties.txt. Open it up and replace server names for all the nodes under #Hosts and for the DB_HOSTNAME under #Database Host with the host name of your machine (obtained as per point 1 instructions). Also, ensure that you change the Log and Data directories to point to the appropriate drive on your server (most likely C drive). The modified clusterproperties.txt file’s content should resemble the image below.
Next, save the file and from an elevated command prompt with administrative privileges, run the following command ensuring that directory path reflects your environment/folders setup.
msiexec /i "C:\Users\dingopole\downloads\hdp-2.0.6-GA_extract\hdp-2.0.6.0.winpkg.msi" /lv "hdp.log" HDP_LAYOUT="C:\Users\dingopole\Downloads\hdp-2.0.6-GA_extract\clusterproperties.txt" HDP_DIR="C:\hdp\hadoop" DESTROY_DATA="yes"
Alternatively, open up the PowerShell prompt in Administrator mode and execute the extracted MSI through this command, ensuring that you have navigated to the directory where the MSI file is stored.
msiexec /i "hdp-2.0.6.0.winpkg.msi"
The below image depicts the command input in PowerShell as per my VM’s directory structure and the HDP MSI file’s saved location.

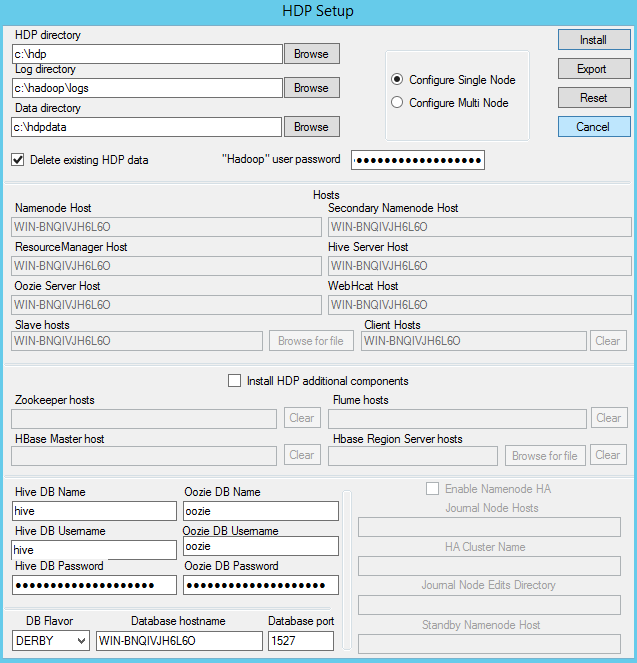
This should provide you with the following output where many parameters should appear pre-populated with default values. Complete the form with the parameters which reflect your environment ensuring that DERBY and not MSSQL is selected from the drop-down for ‘DB Flavour’ selection and that ‘Delete Existing HDP data’ is ticked as per image below.
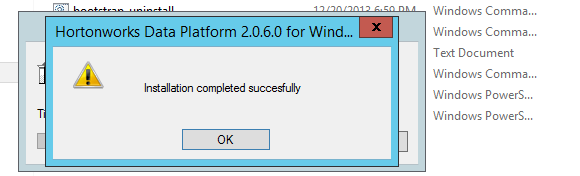
A successful installation should conclude with the following message displayed on its conclusion.
On the desktop of your server you should now see three new icons. Click the Hadoop command prompt and navigate back one directory by executing the following.
cd..
Next, type in the following to start services associated with HDP installation.
Start_local_HDP_services
Wait for a few minutes for this job to complete and validate the services start-up by issuing the following from the same command prompt.
Run-SmokeTests
This command runs a variety of tests against the new installation to ensure that MapReduce, Hive, Pig, ZooKeeper etc have been provisioned correctly and are running as expected.
Conclusion
As you can see, unless you’re happy to use a VM image provided by Hortonworks, installing Hadoop can be a quite involving process, even though this is only a single node installation. There have been whole books written on Hadoop environment provisioning so this post is only meant to serve as an introduction to a much complex issue of the Hadoop environment deployment. At this stage, regardless of which distribution you choose to go with, the ecosystem is still in a state of flux with new features rolled out nearly every month. The status quo around the companies supporting those distributions also fluctuates e.g. Intel abandoning their proprietary Hadoop release in favor of investing in Cloudera instead so even though it hurts me to say it, I wouldn’t necessarily take these instructions for granted. At the same time, any forthcoming releases should become more coherent, integrated and easier to deploy and manage so the ease of breaking into the Hadoop ‘black box’ should also become more straightforward.
As this is my first post on Hadoop I have merely managed to scratch the surface of this technology. In the next few posts I will dive deeper into the HDP/Hadoop paradigm, exploring its features and functionality in more details so stay tuned!
http://scuttle.org/bookmarks.php/pass?action=addThis entry was posted on Sunday, April 6th, 2014 at 7:49 am and is filed under Hadoop. You can follow any responses to this entry through the RSS 2.0 feed. You can leave a response, or trackback from your own site.


